October 15, 2024

Creating My 1920s Halloween Fancy Dress


With Halloween just around the corner, I couldn't resist revisiting one of my absolute favorite Halloween creations! Although I made this 1920s-inspired fancy dress back in 2022, I had to include it here because it was such a fun project—and perfect for this spooky season. The whole process was full of surprises and fun little DIY wins, so I couldn’t help but share the story behind it!

The Inspiration and Quick Turnaround

I got inspired by a stunning 1920s fashion plate (thank you, @sew.midcentury!) and knew I had to re-create it!  Now caveate, I'm sure this original costume was a paper mache as they were soooo popular at the time!  But I was really just going for the overall look and it was obviously a costume so I knew I has some leeway here as well.  Yes!  My favorite kind of project! 


With only about a week to spare between commissions, I ran out to my local JoAnns to see grab what they had.  I found some fabrics that were going to work perfectly!  Except the pumpkins were gong to need to be dyed!  Ut oh!  I'm a novice when it comes to dying so that made me a little nervous.  But I wanted this to work.  So I just went for it and crossed my fingers that some @ritdye magic would pull it all together. Spoiler alert: it absolutely did!

"Dyeing" To Pull it all Together


I won’t lie—I was a little nervous about dyeing the fabric for this project. The main fabric had glow-in-the-dark pumpkins, and I wasn’t sure how they’d take the dye. Plus, my dyeing experience was limited to a single hat years ago, so I wasn’t exactly a pro. Well as I am prone to do, I didn't waste time thinking about it, I just tossed the fabric into the "tangerine" dye and crossed my fingers!
Watch the video here.

To my surprise, it turned out perfectly! In just 15 minutes (half the time recommended), the fabric took on the most vibrant orange, and—CAN YOU BELIEVE IT—the pumpkins kept their glow! I was super excited to see it all work out so well.

After dyeing the pumpkin fabric, I noticed that the orange in my diamond-patterned fabric looked a bit muted by comparison. So, I gave it a quick dip in some tangerine dye—just five minutes was all it needed. The colors came out beautifully, and everything was finally in harmony.

Bringing the Dress to Life

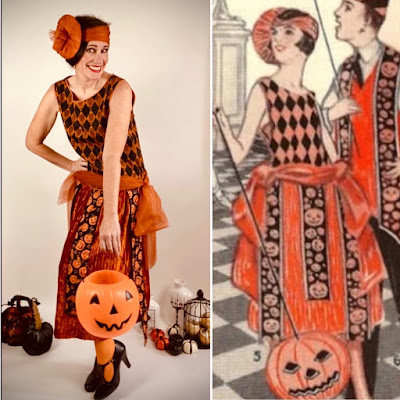
For the dress itself, I started with an authentic 1920s pattern (New Butterick 1376) adding a few tweaks here and there to fit my overall look. The original design featured scalloped trim along the bodice and skirt, but I opted for a cleaner, simpler look. I scooped out the neckline and widened the armholes slightly to capture that easy, elegant 1920s silhouette. The skirt was a simple gathered rectangle. 

The real star was the fabric!  I used the most incredible crushed velvet for the skirt. It was synthetic but felt and looked just like a vintage silk velvet fabric!  (So, of course, I had to run back out to JoAnns and buy up the rest of it in orange and green for future projects.  I mean we all do this, right?!) Every time I walked the fabric had that perfect 1920s swish. It really gave the dress so much character!

Finishing Touches

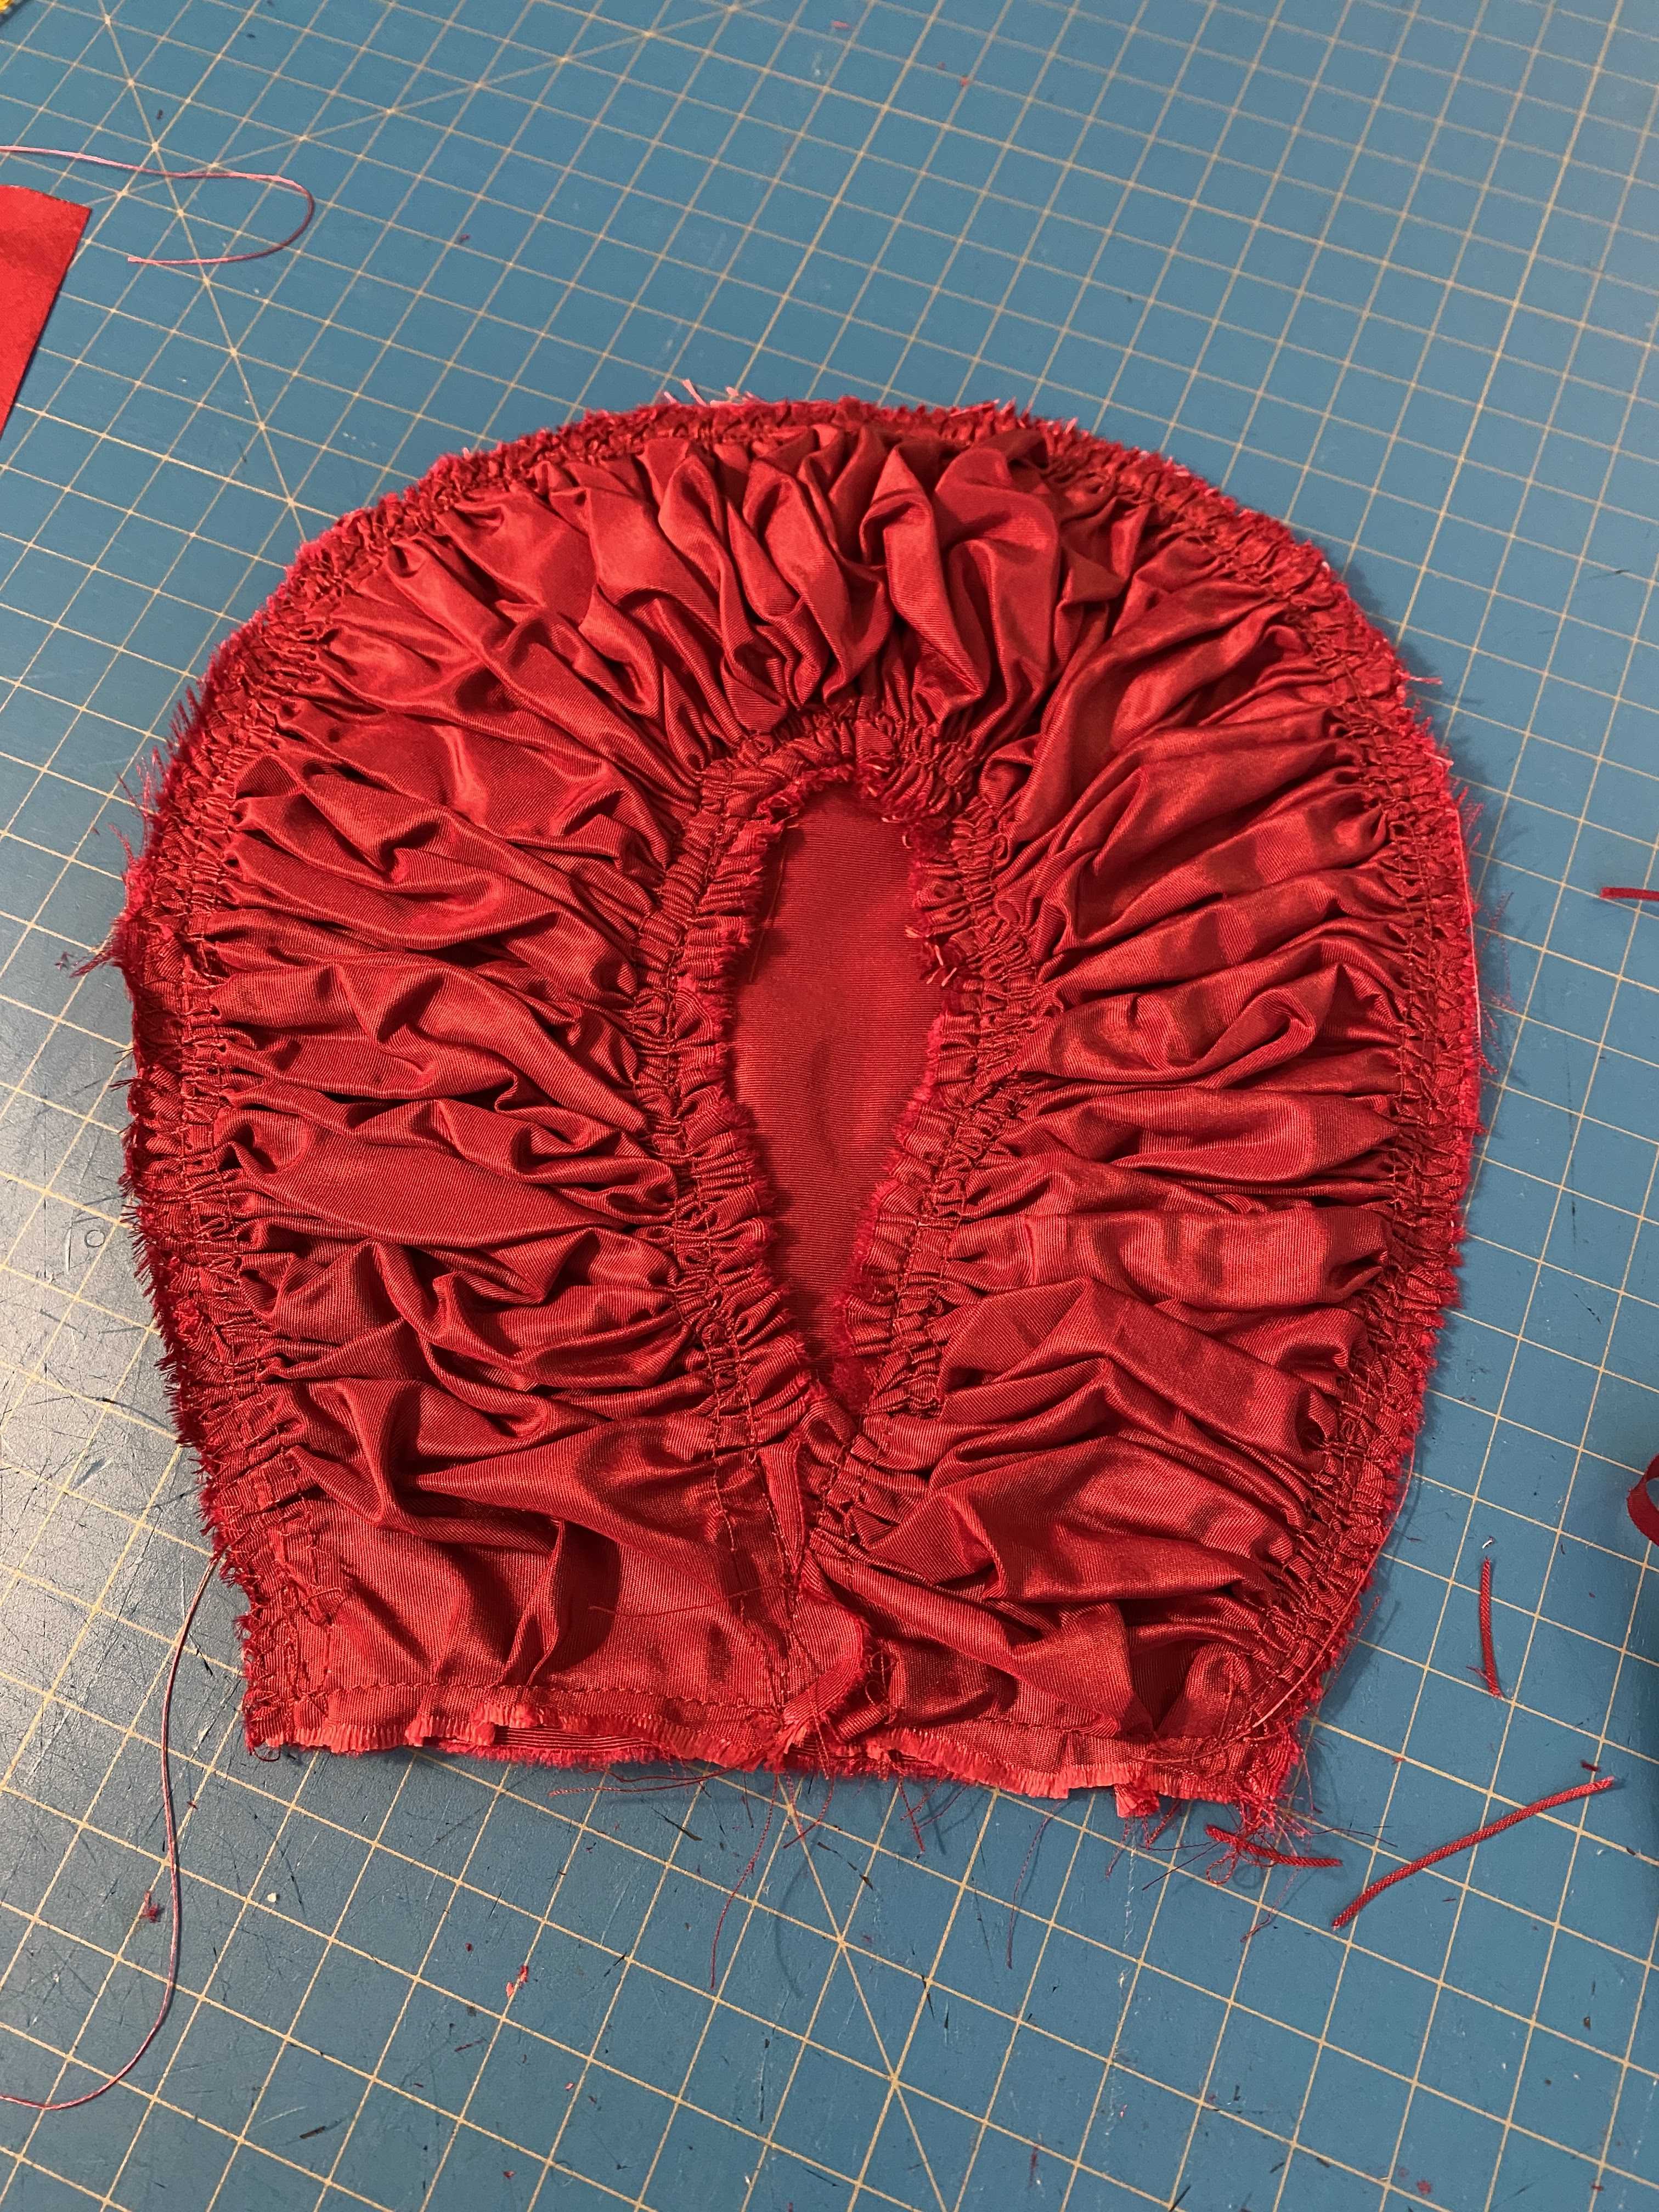
The waistband was totally a last-minute stroke of luck! (Remember, I was working on a tight timeline, so “perfectly authentic” materials weren’t happening.) I grabbed the very last bit of rusty orange netting at Joann’s and loved how it pulled everything together. I even had just enough left to whip up a matching headband—wrapped around a paper plate for structure, of course, because DIY is all about getting creative!

No 1920s look is complete without a bob, so I gave myself a faux bob, piled on some smoky eye makeup, and topped it off with red lipstick for that classic 1920s flair. The result? A look that was both vintage and Halloween-ready!


Okay and can I just say . . . LOOK AT MY SHOES!  These are my absolute favorite shoes and they are not 1920s!  They are Sofft brand shoes and the most glorious, most comfortable pair I own!  If you ever get a chance to snag a pair (eBay) DO IT!

Reflecting on My 2022 Creation

Photographing this dress was an absolute joy—especially because I stepped in front of the camera for once!  Normally, I’m behind the scenes, because being in front is honestly out of my comfort zone.  But if I can be silly then I'm game.  Usually the silliness turns out complete garbage, but this was just me and my camera and it was a fun time!  (Watch the silly video here.) 


This 1920s Halloween dress was one of my favorite creations from 2022, and I hope I get the chance to wear it to an event someday. If you want to see more behind-the-scenes details or my creative process, check out my Instagram highlights and reels. I had so much fun with this project, and I’d love to hear your thoughts in the comments!

Here’s to another year of vintage-inspired Halloween creations! ๐ŸŽƒ๐Ÿงก

#1920sHalloween #VintageHalloween #BeespokeVintage #1920sFashion #HandmadeWithJoann #VintageStyle #SewingCommunity #VintagePatterns #1920sDress

September 16, 2024

Make-Do-And-Mend: Regency Chemisette

This was another quick and dirty, do-it-in-a-day project and I'm actually super thrilled about the results!

So let's talk about the idea of recycled clothing.  It's definitely not a new idea even though Millennials or Gen Zs (or Ys or Xs or whatever the latest generation is being called) may like to believe THEY came up with it because only THEY want to save the world from ultimate destruction of human kind and evil capitalism . . .  Ooops, sorry I digress.

Anyway, reusing and repurposing clothing has been around, well as long as clothing has been around I suspect.  And not just mending holes.  I'm talking whole-sale reconstructing one garment into something else.  I LOVE to do it because it's so fascinating to see how one item of clothing (especially when it has been really loved) can turn into something entirely different with a whole new spirit!

So here we go with a favorite button-down shirt of mine (by Levi's) that I likely bought from Target probably a decade ago.  I have love, love, loved it, but I find myself never wearing it anymore.  I had it in a pile to give to Goodwill, but I kept taking it out of the pile because, well something was telling me to.

And last week as I passed by it again I thought . . . YES!  CHEMISETTE!  And that day the shirt and I conspired to create a beautiful, Regency white, cotton, dotted swiss chemisette.  And it was perfect.  

HOW IT STARTED:  Okay here's the shirt in it's original form.  Washed but not ironed.  In perfectly good shape, no tears or stains.  I think I stopped wearing it because it just got a bit big on me.


THE PATTERN:  I used one of the many scaled diagrams in Janet Arnold's Patterns of History (but honestly chemisettes are pretty easy you can probably make one of these up on your own at home).

I used the top left gathered diagram for it's simplicity.

Because I was limited to the original shirt I did NOT do the back on the bias.

THE DE-CONSTRUCTION:  First I had to very carefully remove the two front breast pockets.  Easier said than done.  I did pick one very small hole in one part ;(  I then cut off the back shoulder piece along with the collar (all in one piece and discarded that) and cut the side seams off.  I was left with the front two halves and the back.  I ironed the shirt front and back to make sure I would cut it as evenly as possible.  Though to be honest this is a pretty forgiving project.  I did not cut off the bottom hem becuase I thought it would become the new bottom hem of the chemisette.  However, because I changed the shape a bit, I ended up cutting it off and should have just removed it from the beginning.


THE CONSTRUCTION:   That's pretty much it.  Trace the pattern onto the shirt, hem the side seams, hem the bottom (create a channel through which to run twill tape to gather around the raised waistline).

Initially I left the button placket in the front thinking I might just change out the buttons to fabric covered and leave the button holes (I didn't want to lose any width in the fabric) but I didn't like how that looked and removed the front plackets to make a plain front as the pattern indicated.

I debated over a plain or frilled neckline.  I did not want to attempt the mushroom pleated collar in the book because this was a one-day between bus pick up and drop off project so there wasn't time) so I settled on a pre-made ruffle and went with the frill.
Plain neckline option.

Ruffled neckline option.


THE FINISHED RESULT:  I love it!  And I can't wait to wear it out. Perhaps it will be a favorite piece when my bestie an I travel to Bath next year for the Jane Austen Festival!  Time will tell.


WORN UNDER A SHEER GOWN:


What is YOUR favorite Make-do-and-Mend project?  Please share in the comments.

September 12, 2024

The Making of an 18th Century Silk Calash


I have wanted to make one of these crazy calashes for as long as I can remember!  They just exude romance and complexity and extravagance and hey . . . I love a good challenge!  Well, the diagram in "Fitting and Proper" has been sitting on my workbench for months as I worked on another project from the book and I finally just decided to grab a spare day between projects, find a silk I loved and go for it!

I had just over a yard of cranberry red silk left from the 1790s redingote I made back in March for the Lafayette Fundraising Gala in NYC, and knew it would be perfect for the calash!  First, because I LOVE THIS FABRIC and COLOR!  Secondly, because the calash could actually be worn with the jacket at some point if I ever got my hair up into one of those fabulously high hairdos!

My daughter, Emily, Lafayette (Mark Schneider), and myself
at the NYC American Friends of Lafayette fundraiser, March 2023

Although original calashes were structured with reed caning in their channels, I opted again to go with something I already had on hand: paper reed (fiber rush). I had originally purchased paper reed with grand plans to create some of those FABULOUS museum-style paper wigs


However, with so many projects already in the works, I decided to save myself the learning curve and repurpose the twine for my Calash frame instead of buying reed. This not only worked beautifully but also allowed me to stick to my goal of using fabric and notions I already had on hand before indulging in any new fabric purchases.

Now here's the most important thing to understand in the making of this calash: I MADE THIS IN ONE DAY!  Start to finish from conception to completion.  It was a quick project between commissions (and parenting and life and etc etc).  So I decided I wanted to make a calash, chose the fabric, chose the basic finished look and went to town!  It's a simple project if you want it to be, with absolutely stunning results!  If you want to put more time and thought into it, your calash can be even more glorious!

So . . . let's get into the details of making the calash.

FIRST, THE INSPIRATION:  The calash first came into being when the hairdos of the 18th century became enormously high.  It's fun to look at old fashion plates and cartoons which obviously enjoyed poking fun at the ridiculous lengths to which the calash (as well as the hair beneath) would get.  Of course, these were exaggerations, but in some cases, they may not have been far off.  I wanted something a bit more subtle but still elegant in it's final creation and settled on the bottom two images as my final inspiration.
Popular depiction of 18th Century Calash showing the high hairstyle and the cap being worn underneath.

Caricature of a Ginormous 18th Century Calash

Red silk calash

Green silk calash with ruffles in front and brown lining

SECOND, THE PATTERN:  I just used the scaled version found in Fitting & Proper again because I had it on hand.  Essentially, this bonnet is one giant rectangle of cloth gathered along the channels.  I did decide I wanted my calash to be larger than the one in the book (which was more modest as these were garments primarily from the ordinary citizens of Pennsylvania).  So I made my rectangle larger and then basically eye-balled the length of reed for the front of the bonnet for the size I wanted.  I kept the back proportions close to the original - adding only an inch or two.

Diagram from "Fitting & Proper"


THIRD, THE CONSTRUCTION:  As I mentioned before, this is basically a large rectangle of fabric in which narrow channels are sewn, through which reed is inserted and the fabric is gathered or rouched along.  The gathering is the trickiest part (especially for arthritic fingers) because it is just . . . tedious.  It's a lot of scrunching.  Gathering, pushing the reed along, gathering, pushing the reed along, etc. I'm guessing here if I'd used smooth, actual reed and not paper, it might have moved through the fabric a bit easier - I will try reed on future calashes and report back.

Sewing the channels.

The finished channels before inserting the reed.

To line or not to line:  The example from which the book's pattern was made did not include a lining except for the very back piece.  Some historical examples include linings and some do not, so that would be up to you.  I wanted mine to be light and airy (especially because I was using the paper reed and afraid too much weight in the bonnet itself would not be supported by the paper) so I opted not to use lining.

The back piece of the bonnet is what creates the structure to which the long rectangle will be attached.  I don't feel like the instructions in the book really explained this well so I just winged it.  I made another long strip of fabric and gathered both edges with running stitches.  I then puled the running stiches gathering them to fit (in sort of a horseshoe/loop shape) around the flat back part of the bonnet.  I stay-stitched the outer edges down to keep them in place.  Then as neatly as possible spread the gathering in the center and stay-stiched it down as well.
The gathered strip of fabric stay-stiched to back portion of the bonnet.

Because my gathered strip didn't quite meet in the middle, I needed to make a "cover" (remember I was working with just a bit of leftover fabric so I was making do with what I had).  I made a teardrop shape that would cover the raw edges of the gathered strip in the center, stay-stiched the seam allowance, cut the seam allowance along the curve, and pressed the seam allowance to the inside.


The teardrop shape ended up being much larger than I needed, so I just adjusted as I went along, hand-sewing it to the back of the bonnet to covered the raw edges of the gathered strip in the middle.


The finished back of the bonnet and the top of the bonnet before inserting the reed.

INSERT THE REED BEFORE YOU ATTACH THE BACK PIECE OF THE BONNET!  That is my advice but you may have a better/different method.
The back pinned to the forepart of the calash.

Attaching the back of the bonnet to the forepart of the bonnet really must be done by hand. Be prepared to look like you've been attacked by a cat from all the pins poking and scaping you. Or I supposed you could be better prepared and wear long pants and use a thimble. =) This is again one of the more tedious parts of the whole process, but if you enjoy hand-sewing it can be very soothing too.

Prior to gathering the stiches between the reed channels.

Remember that there is a row of gathering stiches between each row of reed boning. I eyeballed mine and did it by machine (because I was in a mad rush to do this in one day between bus pick up and drop off). But this is a great opportunity to really show off some beautiful handwork if you are proud of yours!


FINISHING THE NECKLINE: The trickiest part may be finishing the neckline (is this the third or fourth thing I've said is the trickiest part after I said this is an easy project? =) I didn't get good pictures of it, but basically, I gathered all the free edges of the reed at the bottom of the neck edge so they were about a half in apart (tucking the fabric between each reed). You'll want to push the reed up inside the channel a bit so you don't try to sew over the reed. Stay-stitch (or pin) this "tucked" neckline down so that it keeps its shape. This is what you will attach the neck drape to. There's a pattern piece for it in the book but again I had to sort of eyeball the tucks at the neck edge to make it fit nicely from center back to front edge. (Of course, the neck drape has a narrow edge hem all around the edges except for where it attaches to the neck).


Now . . . you may want to cover the raw edges of the neck on the inside with some sort of binding, self-fabric, or overcast stitching. I zig-zagged mine and called it a day because it really is not seen. But I can easily cover it with a soft binding in the future if I wanted to.

The finishing touches are to add a self-fabric bow to the center back, self-fabric ties to the front and . . . a very long ribbon loop about eye height that will hang down almost to your waist and that will allow you to hold the calash open and up over your head (because it is so heavy).

Neck drape and bow back.

Detail of the back with bow trim.

See narrow black ribbon bonnet "holder"

This project was so much fun and honestly not as challenging as I first expected it to be!  I will definitely give it another try with real reed caning instead of the paper reed and see how that changes the process (I suspect it should be easier). 

If you've made one before, plan to, or have thoughts on this whole project please let me know in the comments below!